Fortunately, there are a few tricks that you can do in order to find out the actual size of directories by the amount of computer storage space they take up. In terms of file systems, there’s very little difference between folders and directories. What your file browser calls a folder really is the same thing, so these tricks will work regardless of what verbiage you prefer. The term directory is used for the sake of consistency.
Method 1: Sorting Directories with the Disk Usage Analyzer
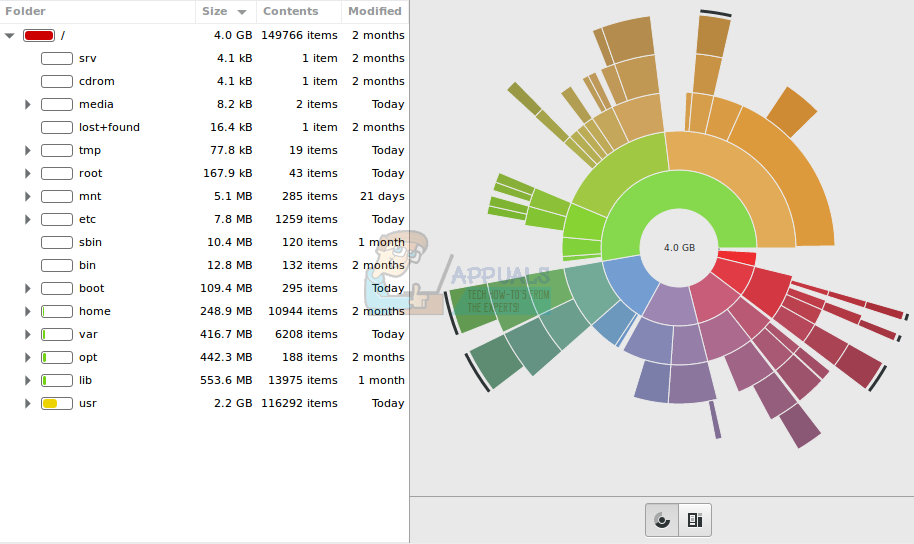
Ubuntu, Debian and Linux Mint users who prefer graphical disk analysis tools may wish to try using sudo apt-get install baobab from the prompt. Fedora and Red Hat users can generally use sudo yum install baobab from the command line, but keep in mind that being a GTK+ application you might end up needing to fill some dependencies if you’re using a QT-based desktop environment like KDE or LXQT. Once you have everything satisfied, then you could start the application from the command line by typing baobab or you could search for it from the Dash in Ubuntu’s Unity desktop. You could hold down the Super or Windows key and push R then type baobab if you’d rather use the Application Finder or you could start it by clicking on the Applications menu and finding GNOME Disk Usage Analyzer in the System Tools category. It all depends on which desktop environment you’re using. As soon as it starts, baobab will prompt you to select a file system. Select whichever device contains the directory you’re looking for and give it a few moments to enumerate the directory structure on it. Once it does, the program will present you with a top-level sort of all the directories on your device.
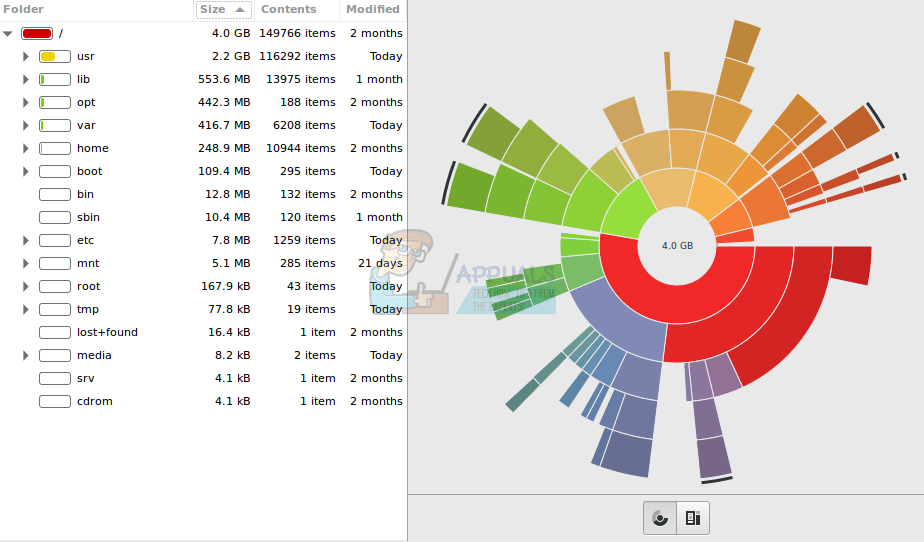
You can click on the Size button to sort the directories from highest-to-lowest in terms of actual size, but the opposite is the default. Click on the arrows next to a directory’s name to expand it and thus sort the subdirectories that live beneath it.
Clicking on the Contents subheading will actually sort the directories in the same manner that a file manager usually does, so this can be useful to compare the actual size versus the sheer number of items living within the subdirectories of each top-level directory.
Method 2: Using the Classic du Tool
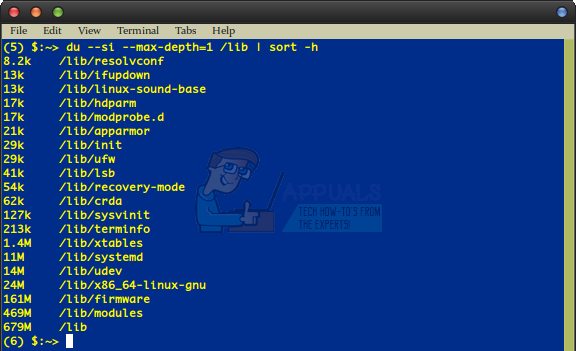
You can use the Unix command line disk usage (du) tool from nearly any Linux prompt if you don’t mind working on the command line. This program will summarize the disk usage of any set of files. Should you run it without any arguments, then it will proceed to look recursively through each directory and summarize the size of each until it reaches the end of a tree. Assuming you’d rather sort each directory from a certain section by their size, you could use the following command: You’ll need to replace nameOfDirectory with the directory that you’d prefer to start in. Say for instance you wanted to sort all of the directories found in directly underneath /lib by size. You could run the command as: You may wish to change the number after –max-depth= since this value defines how far down in the directory structure the du command should search. However, since the object here was to avoid searching through an entire tree we elected to leave it at 1 and look underneath a single directory. The –si argument indicates that the du command should print sizes using the International System of Units, which defines one kilobyte as equal to 1,000 bytes. While this is preferred by those who migrated to Linux from OS X or are used to calculating directory sizes with hardware sizes, many users are most used to binary sizes where 1,024 bytes equal 1 megabyte. Replace –si with -h as follows: This will render the output as expected if you prefer binary sizes. If you’re used to measuring things in so-called kibibytes, then you’ll want to use this command as well. You may also wish to include the | less or | more command to the end of this command line if you’re finding so many subdirectories in a top-level directory that the output surges right off the page. Remember that you should be able to use your scrollbar, trackpad or touchscreen to scroll through the results in any modern X terminal emulator.
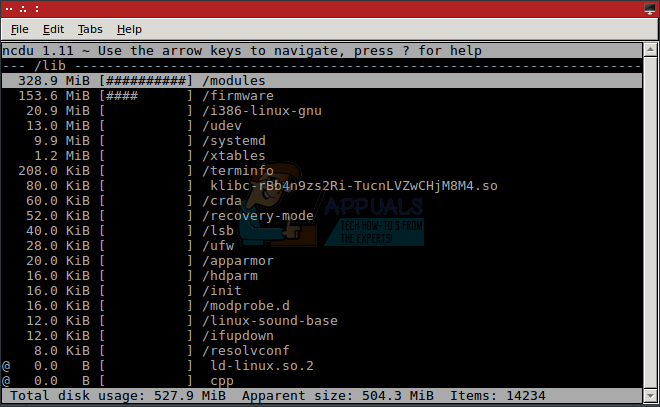
Should you find yourself using this solution often and wish instead that you had a version built on new curses, then you can use sudo apt-get install ncdu on Debian, Ubuntu, the various Ubuntu spins, Bodhi and Linux Mint to install a ncurses-based du viewer. Fedora and Red Hat users should be able to use sudo yum install ncdu if they’ve set up a sudoers file, or su – followed by the administration password followed by yum install ncdu if they haven’t yet. More than likely you shouldn’t face any dependencies because the program is based on ncurses and little else. You can either run it from the current directory by typing ncdu or look inside of a different part of the tree by typing ncdu /lib or whichever directory you’re interested in browsing.
You’ll be told that the software is calculating the number of items that it found within the requested directory. Once it’s finished you can browse the directories in the order of their true size by using the arrow keys. You can push the S key to sort the directories back and forth in their size order.
OnePlus 10T Pricing Might Make it an Actual Flagship Killer This Time AroundHow to Fix ‘Incorrect permissions on Windows Search directories’ IssueHow to Identify Shared Files and Directories on OneDrive?How to Sort Your Skyrim Mod Order and Stability Test for Crashes


