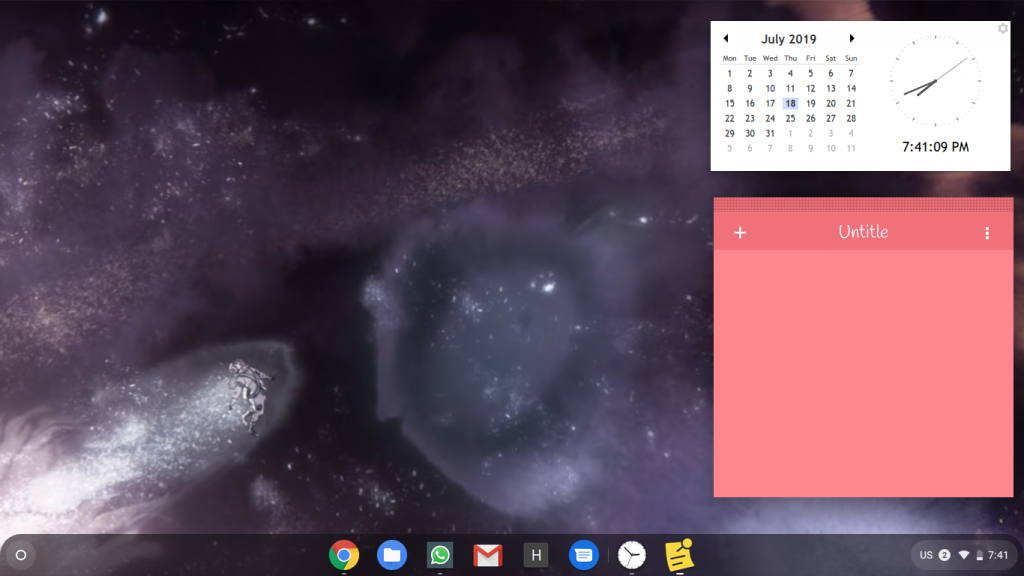
Now, there are two ways we can go about setting up widgets for a Chromebook. One is just to install widgets directly from the Chrome Web Store. These are not android widgets but have been developed specifically for Chrome. The second route is to make Android widgets work on Chrome OS. For that, though, you need to make sure that your Chromebook is compatible with Android apps. Here’s the list of compatible Chromebooks. And also, the method only works on Android Pie, so make sure you’re running Pie. In case your Chromebook is not on the list, or you’re not able to run the latest version of Android, we will walk through installing simple Chrome widgets on the Chromebook first. If you do have a Chromebook with Android Pie, you can jump directly to the second half of the article. Chrome Widgets for Chromebooks Without Android Pie For Chromebooks without Android Pie, basic widgets like the clock, weather, calendar and sticky notes can still be installed. This is because developers have made available widgets apps for Chromebooks on the Chrome store. Here’s an example of how your desktop could look once these apps are set-up – First, we will install the separate apps for these widgets from the Chrome Web Store. Note that this isn’t an exclusive list, but they’re the widgets I use and find reliable. Once you’ve downloaded these apps from the Chrome Web Store, you will need to open them from the Apps menu. You can either search for them using the search button on your Chromebook’s keyboard, or browse the App drawer from the desktop. When these apps are open, the widgets will show up on the desktop, and stay there. They won’t automatically overlay over other apps, like the Chrome browser, but if you want them up, you can just press Alt+Tab to get them to the foreground.
Android Widgets for Chromebooks Running Android Pie
For Chromebooks that run Android Pie, the potential for widgets increases significantly. There’s no straightforward way to get Android widgets on Chrome OS, but there is a workaround. Here are the steps to follow –
Install Taskbar
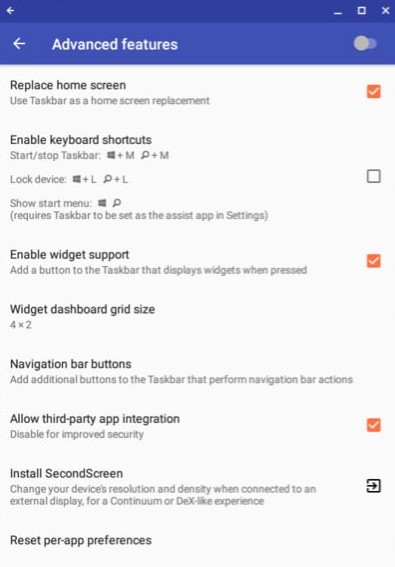
Download and install the Taskbar app from the Play Store on your Chromebook. Open the app, and navigate to Advanced Features under Settings. Here, make sure the boxes ‘Replace home screen’ and ‘Enable Widget Support’ are ticked. When you tick ‘Replace home screen’, a pop-up window will ask you to give Taskbar permission to draw over other apps. Make sure you give this permission because it’s essential for the widgets to show up. Then, an additional taskbar will show up on the desktop. On the taskbar, you will see a widgets button. Click on that button, and then click anywhere on your screen. A pop-up will show up with a list of app widgets you can choose from. As long as the app is installed on your Chromebook, the corresponding widget should be on the list. You can then set up widgets like Google Calendar, the Android clock, Spotify, from news apps, etc. In case you don’t want the taskbar to show up on the bottom of the screen (which is where the Chrome OS taskbar already is) you can move it up to the top of the screen too. That’s all there is to it. You can now experiment with all kinds of widgets, and give your Chromebook desktop the look and functionality you want.

