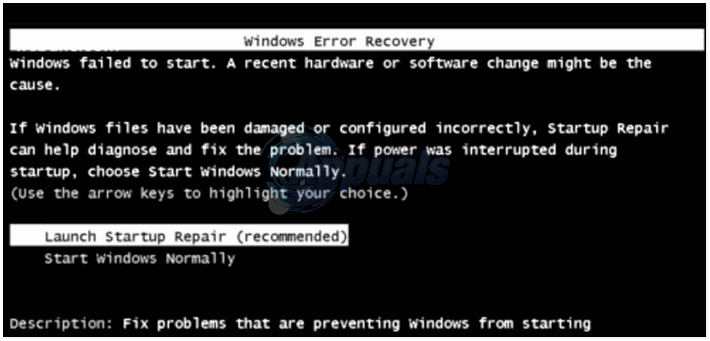
“Windows has failed to start. A recent hardware or software change might be the cause.” The error message screen also provides the user with a couple of options that can be used to resolve the issue (such as running Startup Repair or starting Windows normally), but no matter what option the user chooses, they are bound to return to the same “Windows failed to start” error message. The cause of this issue can be anything ranging from an incompatible or faulty hardware, software (program or application) or driver/update that you recently installed to corrupt boot files or an issue with your HDD (or SSD). Since the causes of the “Windows failed to start” error message are so diverse, so are the solutions that have proven to work for Windows users who have been affected by this issue in the past. The following are some of the most effective solutions that you can use to try and resolve this issue and successfully boot into your Operating System:
Solution 1: Remove any hardware that you recently installed and reboot
If you installed any hardware (such as printers or cameras) before your computer started going haywire and spewing out the “Windows failed to start” error message on startup, it is quite likely that the hardware you installed is the culprit. If that is the case, simply remove the hardware that you installed (and preferably all other non-essential hardware, leaving only the mouse and keyboard attached) and restart your computer. If your computer boots into its OS as it should, the hardware you removed was indeed the culprit.
Solution 2: Make sure that your computer detects its HDD and is booting from it
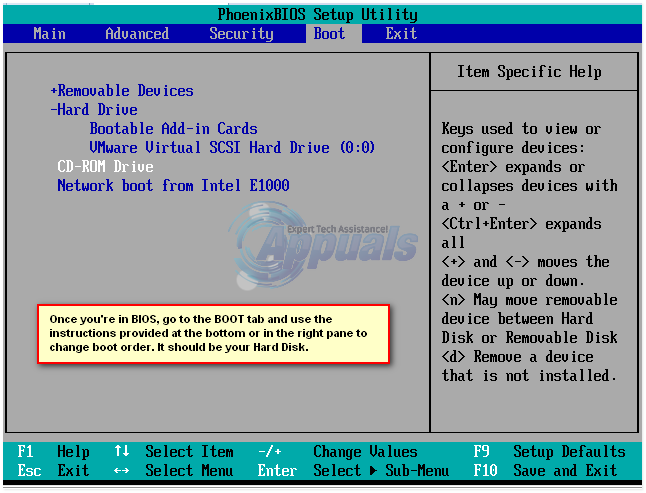
Restart your computer, and at the first screen that you see, press the key that will take you into its BIOS settings. You will find this key on both your computer’ user manual and on the first screen you see when it boots up. Once in the BIOS settings, peruse its tabs until you find the Boot priority order (or Boot order). Highlight Boot priority order and press Enter, and when you see a list of devices that your computer tries to boot from, make sure that your HDD is on the top of the list. If your HDD is nowhere to be found on the list, open your computer up, and remove and reseat the SATA or IDE cable connecting the HDD to the motherboard (or preferably replace it altogether), boot your computer up, access the BIOS settings and see if it now detects the HDD. If the HDD is still not detected, run diagnostics on it (See: this guide) to determine whether or not it has failed or is failing. If your HDD is on the list but is just not on the top of it, configure the list so that the HDD in on top and is your computer’s first boot device. After doing so, save the change, exit the BIOS and restart the computer to see if the issue has been resolved.
Solution 3: Perform a System Restore
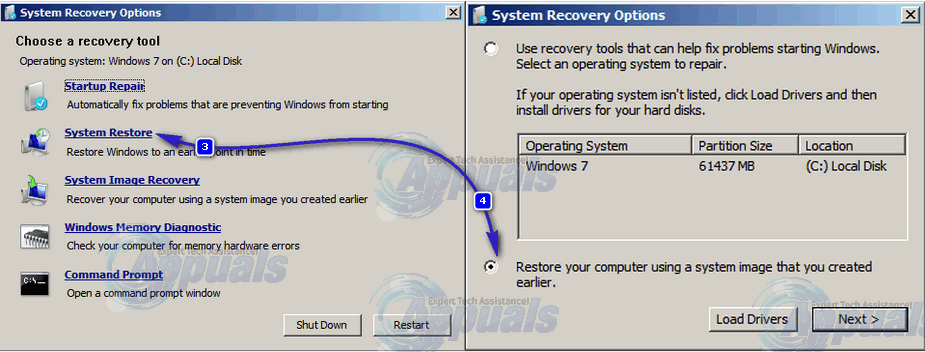
If this problem is being caused by a program, application, driver or update you installed, restoring your computer to a point in time before it was installed should be more than enough to fix it. Insert a Windows installation disc or Windows system repair disc into the affected computer. Restart the computer and boot from the disc. Note: To boot from the disc, you may have to once again access your computer’s BIOS settings and, instead of just looking at the boot order, change it to set your DVD/CD drive as your computer’s first boot device. Once done, save the change and exit the BIOS settings and you should be asked to press any key to boot from the disc you inserted when your computer starts up. (see how to start windows 7 in startup repair here, and windows 8/8.1/10 here). Select the Operating System you want to repair and chose Repair Your Computer. Click on System Restore. Choose a Restore Point (preferably one that was created days before the problem showed itself). Follow the onscreen instructions to initiate the System Restore. Once the System Restore completes, restart your computer and check to see if the System Restore got rid of the issue.
Solution 4: Perform a Startup Repair
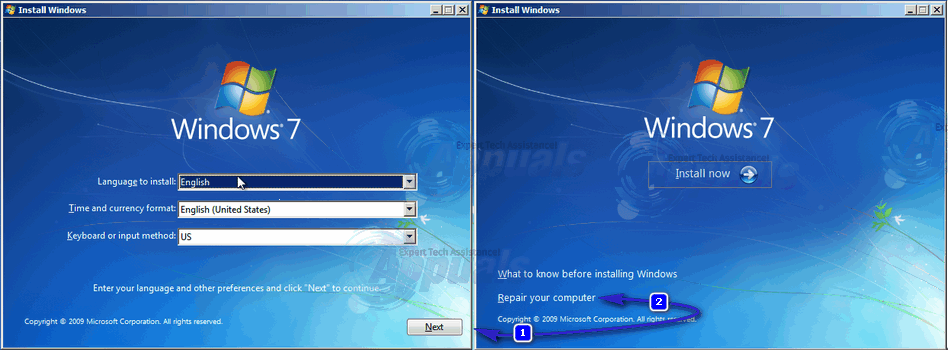
Performing a Startup Repair will fix any and all issues keeping your computer from booting into its Operating System, which is why this method has pretty significant chances of fixing this problem for you. To perform a Start Repair on your computer, you need to: Insert a Windows installation disc or Windows system repair disc into the affected computer. Restart the computer and boot from the disc. Choose your language and other preferences and then click on Next. If you are using a Windows installation disc, you will be taken to a screen that has an Install Now button at its center. On this screen, click on Repair your computer in the bottom left corner. If you are using a system repair disc, you will be taken directly to the next step. Select the Operating System you want to repair. Click on Startup Repair. Follow the onscreen instructions, initiate the Startup Repair and when it completes, restart your computer to see if it fixed the problem.
Solution 5: Reinstall Windows altogether
If none of the solutions listed and described have worked for you, your last viable resort may just be reinstalling Windows altogether. Be warned that doing so will erase all of the data and third-party programs on your computer but also may very well be your last hope.
Fix: Windows Failed Fast Startup Error 0xC00000D4How to Fix ‘DifxFrontend failed!’ Startup error on Windows?How to Fix ‘Display Driver Failed to Start’ Error on Windows?How to Fix Start Menu Opening Up by Itself on Startup from Sleep


