Android devices display a System 7 error when a system update or custom ROM fails to flash, and while the Status 7 error is one of the more common errors associated with the flashing of ZIP files, it is also one of the less serious and almost always fixable ones.
For Non-Rooted Devices
The only instance in which the Status 7 error can be seen on a non-rooted Android device is when a person, instead of waiting for a new system update to reach them Over the Air, decides to sideload and flash a ZIP file containing the official software update onto their device. A non-rooted Android device only displays a Status 7 error when a system update is being flashed onto it and something is found to be out of place or, to be more precise, modified. The Status 7 error only affects non-rooted devices that are not in complete stock condition, so the only way to fix the Status 7 error on a non-rooted Android device is to restore every bit of the device back to its stock condition. If the device is running on a custom kernel, the stock kernel needs to be flashed; if the device has a custom recovery image, the stock recovery image needs to be flashed; and so on.
For Rooted Devices
Android users often see Status 7 errors on rooted Android devices when flashing custom ROMs. The two most common causes of the Status 7 error on rooted Android devices are an outdated version of a custom recovery and a faulty custom recovery. To fix this issue on a rooted device, all a person need do is update to the latest version of the custom recovery they have on their device or switch to a different custom recovery entirely. However, in the event that these two solutions don’t work (which is a rare case), the updater-script of the custom ROM should be edited through the following process:
Copy the ZIP file of the custom ROM onto a computer.
Unzip the file.
Go to META-INF > com > google > android.
Right click on the file updater-script and click on Rename.
Change the name of the file to “updater-script.txt”.
Open the file with a text editor.
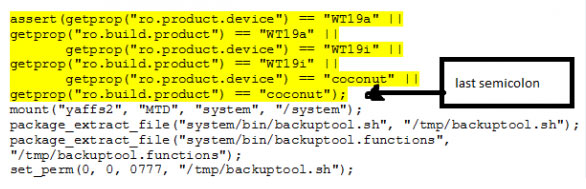
Delete part of the text starting from “assert” down to the next semicolon.
Save the file, close the text editor and change the name of the file back to updater-script.
Compress all of the contents of the unzipped ROM file into a new ZIP file, copy the new ZIP file to the device and flash the custom ROM which will now not give a Status 7 error.
How to Add Status Bar Brightness Slider on Any AndroidHow to Fix Hamachi VPN Status ErrorDoordash Driver Response Status Error Code 1 (Fix)Fix: “Printer Status is Paused, Cannot Resume” Error on Windows?